I’m using this because it is cheaper than a hosting provider for my wordpress blog. At the moment I’m testing it, and you’re using that testing environment!
You can only learn so much by reading, and then you gotta do it yourself. So this is me trying if it works and how safe it is. I will transfer my main blog when I am satisfied with the results.
Components
- Configuration
- Cloudflare, for domain name registration
- Zero Trust Cloudflared tunnel
- 3 services: Docker compose
- cloudflare tunnel
- wordpress
- mariadb
Scroll down to the bottom of this post if you’re interested in the compose.yml
The setup uses one compose file per project. This wordpress site is an example of a single project. None of the resources are shared between projects or between other compose stacks.
Explanation of the components
Cloudflare tunnel:
Each cloudflare tunnel connects your docker compose containers to cloudflare, it connects using the tunnel token.
Preparation
Log in to Cloudflare dash and navigate to:
- Zero Trust
- Networks
- Tunnels
- Click “Create a tunnel”
- Select “Select Cloudflared”
- Name the tunnel, in my case “snor.app-wordpress”
- Click “Save tunnel”
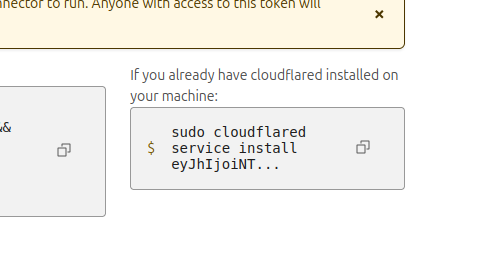
- Copy the token (see screenshot below what to copy)
- Click “Next”
- (Sub)domain name and path
- Choose what you want to use. This URL will become the public entrypoint for your new wordpress site.
- The URL can be changed afterwards, but it is easier to do this right the first time.
- Service
- Type: HTTP
- URL: wordpress:80
- This service is how the cloudflared tunnel container connects to your wordpress container. This is why we can use internal docker hostnames.
It is also why the wordpress container does not need to be exposed on the Docker host, since we will only access it via the Cloudflare tunnel.
- Tunnels
- Networks
Result
You should have noted the following:
- URL, consisting out of
- Subdomain (optional)
- Domain name
- path (optional)
- Cloudflare token
Configure wordpress
Open your browser, and access your URL.
Go through the configuration steps of WordPress.
Bask in the glory of WORDPRESS!!
Then remember that you have something to write about, and start blogging.
Compose.yml
Don’t forget to update the password and token fields!
services:
  tunnel:
    image: cloudflare/cloudflared
    restart: unless-stopped
    command: tunnel run
    environment:
      - TUNNEL_TOKEN=useyourowntoken
  db:
    image: mariadb:10.6.4-focal
    command: '--default-authentication-plugin=mysql_native_password'
    volumes:
      - db_data:/var/lib/mysql
    restart: always
    environment:
      - MYSQL_ROOT_PASSWORD=generateyourownpassword
      - MYSQL_DATABASE=wordpress
      - MYSQL_USER=wordpress
      - MYSQL_PASSWORD=generateyourownpassword
    expose:
      - 3306
      - 33060
  wordpress:
    image: wordpress:latest
    volumes:
      - wp_data:/var/www/html
      - ./uploads.ini:/usr/local/etc/php/conf.d/uploads.ini
    restart: always
    environment:
      - WORDPRESS_DB_HOST=db
      - WORDPRESS_DB_USER=wordpress
      - WORDPRESS_DB_PASSWORD=generateyourownpassword
      - WORDPRESS_DB_NAME=wordpress
volumes:
  db_data:
  wp_data: